ARcreate User Guide
Overview
Easily and quickly create Augmented Reality learning solutions for instruction and training.
ARcreate is an Augmented Related (AR) creation tool that empowers business users and subject matter experts to create powerful custom AR learning solutions as they do their job.
Get the ARcreate App
Download the Mobile, Desktop or XR Headset App from one of the supported App Provider Platforms.
Starting an ARcreate Session
Logging in to the App
- Launch the ARcreate mobile, desktop or XR headset app
- Enter your assigned username and password
- For Government clients of ARcreate, check the
govtoggle to access the Gov hosted version of the application
Info
Users require an Organization Admin to generate a unique username and password. Please contact the ARcreate admin in your organization.
Creating a Procedure
Procedures are instructional step-by-step guides that are anchored to the real world. Steps in a procedure can consist of images, video, icons, and notes as well as instructional text.
- Select the Create Procedure button
- Enter in Procedure details including a name, description and physical location
Info
Only Users with the role of Creator can create new Procedures in ARcreate. If you need the ability to create experiences, contact your ARcreate admin.
Importing an IMRSA Package (Desktop Only)
Per the International Mixed Reality Standards Association IMRSA Specification, IMRSA Experience Modules authored in other content creation tools can be Imported as ARcreate Procedures.
To Import your IMRSA Compliant Package as an ARcreate Procedure:
- On the Procedure Info Screen, select the Import IMRSA button
- From the File Explorer, select the IMRSA Compliant XML file to Import the IMRSA Data Package
- Once the Import is finished, the Info Screen should be populated with information and the Steps should populated w/ all
contentanddatamappings supported from the IMRSA Experience Module in ARcreate
Info
Reference Model and Environment data is not tagged in the current IMRSA Specification so Reference Model and Environment data will not be imported if importing a Procedure encoded in the IMRSA format created from ARcreate.
Generating One or Multiple Procedures (Desktop Only)
Using the ARcreate Desktop application it's possible to "generate" ARcreate Procedures from source or technical data such as instruction manuals. This feature leverages Generative AI capabilities to identify step or procedural instructional content from the provided source material.
Supported Source Data Formats
Currently only the PDF format is supported for source data. Other file types such as .ppt or .doc can be converted to the PDF format via their respective authoring tools.
Info
Procedure Names, Descriptions, and associated Step Instructions are generated by the AI. Associated Images, Video, Models, etc. are not yet able to be generated from the source data.
- From the Home view, select the Generate Procedures button
- If you have any custom instructions to add before the AI analyzes your data, enter it into the text field, e.g. "Create exactly 1 Procedure from the provided document"
- Select a document you want the AI to analyze to generate Procedures to start the analysis
- Wait for the AI to complete analysis of the source data
- View the summarized results which shows the Procedures and associated Steps that were identified from the source data
- Optionally, enter custom instructions to refine the list of Procedures that were generated, "e.g. Split the Procedure into 2 seperate Procedures" and select Update
- Select the Create button to instantly Publish the Procedures for editing
- Select the Export IMRSA button to export all of the selected Procedures in the IMRSA format (also see Exporting IMRSA)
Setting your Environment (Desktop Only)
Important
Setting the Environment is currently only supported in the Desktop version of the app.
When using the Desktop App, setting the Environment establishes an area in scale that approximates the realworld environment scale for the AR Experience. You can use any of the preset scales to approximate the scale or enter custom dimensions to control the precision of the environment scale. An Experience anchor can be added anywhere inside of the defined Environment during placement.
- Select the Environment button from the Side Nav
- Select a Preset Environment Size or enter Custom Dimensions
Setting your Reference Model (Desktop Only)
Important
Setting the Reference Model is currently only supported in the Desktop version of the app.
When using the Desktop App, setting the Reference Model is a 3D model representation of the environment the Procedure will be taking place in or an assembly that will be the primary focus area during the experience.
Important
The Reference Model that's provided should be the realworld scale of the model when exported from the 3D program or app of origin. All units are converted to metric in ARcreate, so confirm units and scale are correct when exporting your 3D Model in .obj, .fbx, .glb, .gltf or .stl format.
- Select the Reference Model button from the Side Nav
- Select a compatible 3D Model in one of the indicated supported formats to import from your file system
- Manipulate the 3D Model using the Gizmo Handles to fine-tune the Position, Rotation, and Scale of the Model in your Environment
Note
It's recommended to avoid the scaling the Reference Model inside ARcreate to avoid deviating from the realworld scale of the object the 3D Model was authored in.
Adding an Experience Anchor
Experience anchors are added to anchor the AR Step content to the realworld. Anchors can either be localized to a physical location or non-localized so that they can be accessed in another remote location.
ARcreate currently supports 3 types of Experience Anchors.
| Anchor Type | Description | Localized | Use Case |
|---|---|---|---|
| Location Anchor | The default anchor type is created by recognizing features in your environment | Yes | Use this anchor for content you want to persist in a single location |
| Image Anchor | This anchor type is created by recognizing a single predefined image or QR Code | No | Use this anchor for content that exists in multiple locations, such as an assembly line in multiple facilities |
| Manual Object Anchor | This anchor type is created using the Reference Model that has been set in the Desktop App. | No | Use this anchor type when you are aligning to a specific object, such as an Engine assembly |
Note
For best results, try placing the Anchor where you'd want a user to start your experience. For example, if it's in an assembly line setting, set it at the begining of the line. This is where the user will need to be in close proximity to launch the experience.
Note
On Desktop, anchors can be aligned / placed directly on the Environment Grid or the Reference Model geometry.
Note
When a Procedure created with an Manual Object Anchor is launched on the Mobile, XR Headset or other platforms, the user will need to manually align the Reference Model w/ the realworld object to start the Procedure.
To add a Location Anchor
Important
Location Anchors will be saved as Image Anchors if created via the Desktop Application. An Image Anchor can be converted to a Location Anchor in the realword environment from the Mobile or XR Headset App by repeating this step when Editing a Procedure.
- While on the Create Start Point step, hold and slide then release along a detected surface in your environment to place the Anchor
- Confirm the placement or Retry to place the Anchor in another location
- Once confirmed, capture environment data by moving your phone around the Anchor from different angles until the progress bar fills completely (Mobile or XR Headset Only)
To add an Image Anchor
The Mobile or XR Headset Image Anchor creation process is as follows:
- While on the Create Start Point step, place a compatible ARcreate Image Target or ARcreate QR Code (XR Device Only)
- If the Image is detected, the anchor will be created directly on top of the Image (Mobile or XR Headset Only)
- Confirm the placement or Retry to restart the Image Detection process (Mobile or XR Headset Only)
The Desktop Image Anchor creation process is as follows:
- While on the Create Start Point step, hold and slide then release along a detected surface in your environment to place the Anchor (Desktop Only)
- Confirm the placement or Retry to place the Anchor in another location (Desktop Only)
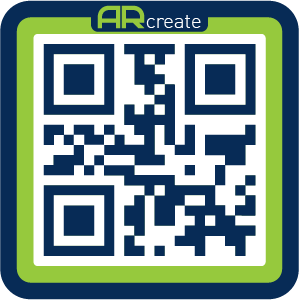
Compatible Image Targets
Download / print the ARcreate Image Target or ARcreate QR Code from your browser. For best results, ensure it's no smaller than 1/4"x1/4" and is placed or taped to a flat surface.
To add a Manual Object Anchor (Desktop Only)
- On Desktop, when on the Create Start Point step, select the Manual Object Anchor type and it will automatically assign the Reference Model as the Manual Object Anchor
Important
If no Reference Model is set, it will use the origin of the Environment on Desktop, and the User will need to align a single Anchor Point versus a 3D Model in the realworld on Mobile or supported AR devices
Adding Steps
Steps in an ARcreate Procedure consist of Content and instructional text guidance.
- From the My Procedure on Mobile or XR Headset or after selecting the Create Steps nav button on Desktop, select the Create New Step option
- Enter a Step Name if it should have a specific name
- Enter Instruction for the Step
- On ARcreate Desktop, enter an optional Step Note for the Step
- Select Next to continue
Instruction Text
Any text entered as Instruction Text will be processed using text-to-speech and narrated in the end user experience when viewing the Procedure.
Adding Step Content
Content is anchored to the realworld relative to the placement of the Experience Anchor.
ARcreate Content Types
| Type | Description |
|---|---|
Text |
Text content is text in the form of a callout / note that branches of a point in space. |
Image |
Image content that can be placed in the environment. |
Video |
Video content that can be placed in the environment. |
Icon |
An icon that can be placed in the environment. |
3D Model |
A custom 3D Model that can be placed in the environment. |
Button |
A world-space button with a corresponding function that can be placed in the environment. |
Important
For the 3D Model component, textures will only be saved / viewable for GLTF or GLB file types. Since GLB and GLTF encode the texture data directly into those files, they're able to be stored in a single file versus multiple files for other supported model formats.
- From the Set Component view, select a Content Type option
- Set the placement of where you want to place the content by tapping, holding and releasing on a tracked surface
- Confirm or retry the placement to place in the desired location
- Follow the steps for selected Content Type
- Toggle whether the content should be
visiblewhen the Step is started by a Viewer - Select Save Step to complete and save the Step and stop adding content
Tracked Surfaces
Surfaces are tracked in ARcreate using a combination of Plane Tracking and Point Cloud Tracking. Point Clouds pick up individual feature points in an environment while Plane Tracking identifies horizontal and vertical planar surfaces. Planar surfaces are represented by blue dots and feature points are represented by green plus signs.
Content Visibility
Every content type's visibility can be checked or unchecked. When checked, the content will be visible when the Step starts. If the content should only display from a Viewer-invoked interaction, such as an interactive button press, then visiblity should be set to off.
Configuring Interactions w/ Button Components
Buttons allow Creators to make thier ARcreate Procedures and Steps more interactive. Buttons trigger functions when they are interacted w/ by a Viewer. The possible functions that can be performed when a Viewer interacts w/ a button includes the following:
| Function | Description |
|---|---|
Next Step |
Goes to the next step in the Procedure |
Previous Step |
Goes the previous step in the Procedure |
Go To Step |
Goes to a specific step in the Procedure |
Exit Procedure |
Ends the Procedure and goes to the selection splash screen |
Replay Procedure |
Restarts the Procedure from the beginning |
Play Animation |
Plays an anmimation for a specified Content object in the Step |
Stop Animation |
Stops an anmimation if it's playing for a specified Content object in the Step |
Show Object |
Shows a specific Content object in a Step |
Hide Object |
Hides a specific Content object in a Step |
Animating Step Content (Desktop Only)
On ARcreate Desktop, all Step Content can be animated using either a Custom Animation or an embedded Animation Clip for supported 3D Model formats. Animations created on Desktop are displayed on ARcreate mobile when Launching a Procedure as a Viewer
To start Animating Step Content:
- Select the piece of Content you want to Animate in the 3D Window
- A Property Pane will be displayed on the right side of the Window
- In the Property Pane,
uncollapseAnimation Properties if they'recollapsed - For all Content Types, Set the Animation Properties and select
Previewto View the Animation - For the
3D Modelcontent type, if the Model has Animation Clips, they can be set to play if theAnimation Clipoption is selected from the dropdown
Info
Supported 3D Model Formats supported for playback of Animation Clips include .FBX, .GLB and .GLTF. Animation Clips can be authored for 3D Models in seperate 3D Modeling and Animation Packages including Blender, Maya and 3DS Max.
Note
Some Content Types like Icon Video Text and Image are Billboarded, meaning the content will always face the Viewer. For content that is Billboarded, rotations specified in animations may be ignored.
Animation Properties
| Property | Animation Type | Description |
|---|---|---|
Animation Type |
All |
The options for Animation Type are Custom Animation and Animation Clip. The Animation Clip option is only available for supported 3D Model formats. |
Transformation Type |
Custom Animation |
When the Custom Animation option is selected, supported transformation types include Move Rotate and Scale |
Duration |
Custom Animation |
The total time of the Custom Animation in seconds |
End Rotation |
Custom Animation |
The amount in degrees the Content should Rotate over the Duration of the Animation. |
End Position |
Custom Animation |
The amount in meters the Content should Move over the Duration of the Animation. |
End Scale |
Custom Animation |
The percentage the Content should be Scaled over the Duration of the Animation. |
Selected Clip |
Animation Clip |
Dropdown indicating which embedded clip will Play on the Supported 3D Model. |
Play On Step Start |
All |
Toggle that indicates this Animation should auto-play as soon as the Step is started for the Viewer. |
Play Once |
All |
Toggle that indicates this Animation should only be played Once when triggered. |
Loop |
All |
Toggle that indicates this Animation should only be played on Loop when triggered. |
Ping Pong |
All |
Toggle that indicates this Animation should only be Ping Ponged when triggered. |
Clear |
All |
Resets all Animation Properties for the Content to their Default values. |
Preview |
All |
Plays the Animation with visualization handles based on the user-defined Properties. |
Confirm |
All |
Saves the actively set Animation Properties for the Selected Component. |
Editing Step Content
Step content can be edited after placement for any individual component.
- From the Create view, select the object in the Step you want to edit
- Select Edit to edit the content, or Delete to the delete content from the Step
- Follow the steps for selected Content Type
- Select Save Step to complete and save the Step and stop editing content
Editing Steps
Steps in a Procedure can be Reordered, Renamed and Step Name and Instruction Text can also be changed.
- From the My Procedure view on Mobile or XR Headset or Steps Scrollview on Desktop, click on the Step you want to edit
Reorder a Step
- From the foldout menu select the Up or Down arrow to move a Step upward or downward
Delete a Step
- From the foldout menu, select the X button to delete the selected Step
Edit a Step
- From the foldout menu, select the Pencil button to edit the selected Step
Duplicate a Step
- From the foldout menu, select the Duplicate button to duplicate the selected Step
Publishing a Procedure
A Procedure can be published and made available to Users in the Organization in the cloud.
- From the My Procedure view on Mobile or XR Headset or the Side Nav on Desktop, select the Publish button
Assigning a Procedure to Users
- From the Home view, select the My Procedures button
- From the list, select the Procedure you want to assign
- Select the Edit Users button to start editing users
- Select the Add User button to add a user, or select the X button next to an assigned user to remove them from the Procedure
Adding Users
Users need to be added to the Organization via the ARcreate Admin Portal in order to be assigned from the ARcreate Mobile or XR Headset App. Please contact an ARcreate Admin to add a new User to your Organization.
Exporting Procedure in IMRSA Format (Desktop Only)
Per the International Mixed Reality Standards Association IMRSA Specification, Procedures can be Exported as IMRSA Experience Modules for Import into other supported IMRSA Compliant XR Authoring Tools.
To Export your Procedure as an IMRSA Compliant Package:
- On the Publish Screen, select the Export IMRSA button
- From the File Explorer, select the folder to Export the IMRSA Data Package
- Once the Export is finished, you can open the IMRSA Data Package via your PC's File System
Viewing a Procedure
Procedures can be viewed by any User assigned to the Procedure.
- From the Home view, select the My Procedures button
- Select the Procedure you want to view
- Select the Launch button to launch the Procedure
- Locate the Location Anchor or Image Anchor or align the Manual Object Anchor to start the Procedure
- Follow the on-screen text and audio guidance and Select the Next button to progress through the Procedure
Viewing a Procedure Offline
Procedures can be viewed offline if the device is not connected to internet and the Procedure has been downloaded when the device was previously online.
Download a Procedure for offline use
- When online, from the Home view, select the My Procedures button
- Select the Procedure you want to download
- Wait for the download to complete, you should see a save icon replace the cloud icon in the My Procedures view
Launch a Procedure in offline mode
- When offline, from the Home view, select the My Procedures button
- Select the saved Procedure you want to Launch
Info
Downloaded / offline Procedures can only be launched / started using Image Targets.
Warning
Offline mode requires being logged in as a previously verified ARcreate user. If the user logs out or is logged out of their session when offline, they'll need to login again with their credentials when online before offline mode is available.